Experiment : 2
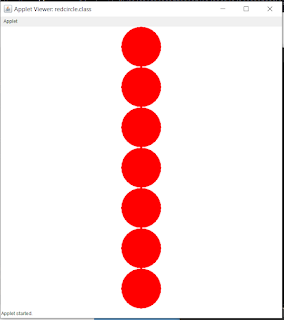
આ practical માં આપણે સાત લાલ ગોળ ઊભી (vertical) માં applet ના વચ્ચે દોરવાના છે.
Code = redcircle.java
import java.applet.Applet;import java.awt.*;
/*<applet code="redcircle.class" width=700 height=700></applet>*/
public class redcircle extends Applet{ public void paint(Graphics g) { g.drawString("Hello",338,355);
int y=0; g.setColor(Color.RED); for(int i=0;i<7;i++) {
g.fillOval(300,y,100,100); y=y+100; } }}- Output
આ task કરવા માટે આપણે આને પેહલા એક applet બનાવ્યે અને ત્યાર બાદ loop ની મદદ થી 10 ગોળ બનાવી.
import java.applet.Applet;import java.awt.*;આપણે અહી import (keyword) નો ઉપયોગ કરી ને જરૂરી library ને add કરી છે. આમાં applet librery દ્વારા applet ના function methods ઉપયોગ કરી સકાસે. એને Awt (Abstract windows Toolkit) windows user interface tools ઊપયોગ કરી સકાઈ.
/*<applet code="redcircle.class" width=700 height=700></applet>*/ઉપર ની લાઈન માં આપણે applet ના dimention hight(ઊંચાઈ) ને width (પોહળાઇ) ને નક્કી કરી છે.
public class redcircle extends Applet
redcircle નામનો class (keyword) બનાવ્યો, અને extands (keyword) નો ઉપયોગ કરી ને applet class ને inherat કર્યો જેથી applet class ની વસ્તુ નો ઊપયોગ કરી સકાય.
public void paint(Graphics g)
અહી paint નામની method બનાવી જેનો return type void છે, એટલે એ કાઇપણ return કરસે નહિ. અને Graphics નો object g ને બનાવી પાસ કર્યો જેથી g નો ઉપયોગ કરી applet માં graphics લગતા function use કરી સકાય
g.setColor(Color.RED);
setColor(Color.RED) મેથોડ એ જાવાની Graphics ક્લાસનો એક મેથોડ છે, જેનો ઉપયોગ ગ્રાફિકલ વસ્તુઓના રંગ સેટ કરવામાં થાય છે. તેમજ Color.RED એ જાવાની Color ક્લાસનો એક સ્ટેટિક ચિન્હ છે, જેથી વર્ણનું પ્રકાર લાલ હોય છે.જો તમે કોઈ ગ્રાફિકલ બનાવવું અથવા રંગપૂર્ણ વાગ્યું વૃત્તબિંબ અને તેની રંગમાં લાલ વાગ્યું વાંચવું છે, તો setColor(Color.RED) નો ઉપયોગ કરીને કરી શકો છો.
setColor function નો ઉપયોગ કરી ને લાલ કલર set કરી દીધું.
હવે આપણે ૭ સર્કલ દોરવાના છે, એટલે આપણે loop નો ઉપયોગ કર્યે.
for(int i=0;i<7;i++) { .. }
Syntax for loop :-
for(initiation, condition, increment) { .. }
for લૂપનો ઉપયોગ કરીને fillOval મેથોડનું સાત સમાન વૃત્તબિંબોને બનાવવામાં આવ્યું છે. પ્રતિ વૃત્તબિંબની y-મૂલ્યને અવરોધવામાં હતી તથા તે 100 પિક્સલ વધારે બદલાય છે પરંતુ x-મૂલ્ય સ્થાયી છે (માને 300). જેમાં, હરેક વૃત્તબિંબની y-સ્થાનનું અંતર 100 પિક્સલ છે, અને વૃત્તબિંબની લંબાઈ અને ચોડી એ 100 પિક્સલ છે.
Initiation માં i=0 i ની કિંમત 7 assign કરી
Condition માં i<7 જ્યાં સુધી i ની કિંમત 7 થી ઓછી હોય ત્યાં સુધી loop ફર્યા કરસે, એટલે અંદર નો કોડ run થાય કરસે.
Increment માં i++ એટલે દરેક iteration (round) વખતે i ની કિંમત માં એક નો વધારો થાય.
g.fillOval(300,y,100,100);
લાલ circle બનાવવાનું છે એટલે fillOval નો ઉપયોગ કરશું
એપ્લેટમાં fillOval એ એક ગ્રાફિકલ પ્રક્રિયા છે, જેમાં રંગપૂર્ણ વાગ્યું વૃત્તબિંબને બનાવીને પૂર્ણ વૃત્તનો ભાગ પંક્તિ દ્વારા વિગ્રહાત્મક કરવામાં આવે છે. અંદાજે, ટૂલકિટ દ્વારા આપેલ વ્યાખ્યા જોઈને એપ્લેટમાં fillOval માત્ર લાલ વાગ્યું વૃત્તબિંબ બનાવવામાં આવે છે.
Syntax :-
fillOval(int x ,int y, int hight , int width)
Int x એ x cordinat ની કિંમત 300
Int y એ y cordinat ની કિંમત અહી variable y
Int hight એ hight ઊંચાઈ અહી 100
Int width એ width પોહળાઈ અહી 100
હવે જો આટલું જ રાખ્યે તો એકજ જગ્યાએ ૭ ગોળ દોરસ પણ આપણે એક પછી એક કરવાના છે ઊભી લાઇન મા.
એટલે y cordinat માં ચેન્જ કરવો પડશે એટલે આપણે
y=y+100;
Y ની કિંમત મા દર વખતે 100 નો વધારે થાય છે. ઊંચાઈ પોહળાઈ 100 રાખી એટલે y ની કિંમત 100 રાખી, જેથી એક પછી એક draw થાય.


ટિપ્પણીઓ નથી:
ટિપ્પણી પોસ્ટ કરો